How to Make Your Own "Distressed" Filters in Photoshop
I've enjoyed Cameron Moll's series on creating "That Wicked Worn Look" but was disappointed that I couldn't try out the techniques used in part 3 because they required a $32 filter pack. However, I got an idea for a technique to simulate the look on the cheap.
- First, find a picture of trees, sticks, dirt, cement, leaves, moss, gravel, or something similarly organic and random-looking. Most stock image sites have plenty of pictures like this, so if you can't take your own you can find something usable at Pixel Perfect Digital or Morguefile or your own favorite stock site.
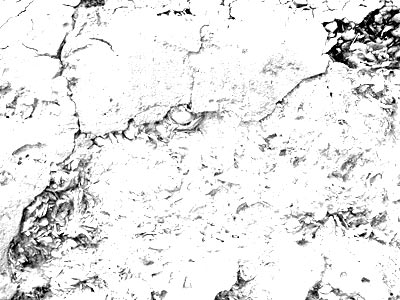
For this demo, I will be using a picture of cement from Pixel Perfect Digital's Textures collection.

- Once you've found the right picture, desaturate it (Image > Adjust > Desaturate) and increase the brightness and contrast (Image > Adjust > Brightness/Contrast). You want to end up with something that's mostly white with some black and gray bits, like the image below.

- Now it's time to introduce the artwork. I'm using a clip-art flourish that came with Illustrator because, in addition to being cheap, I am also lazy. The flourish is on its own layer above the blue background.

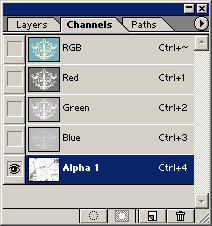
- Here's where things start to get fun! Go the Channels palette and add a new channel to the image you want to distress. Now go back to your black-and-white texture and select the entire image (Select > All). Copy the image and paste it directly into the new channel.

- Go back to your image layer and choose Select > Load Selection > Alpha 1 (or whatever your new channel's named). After the selection has loaded choose Layer > Add Layer Mask > Reveal Selection. Ta-da! A beautifully distressed image.

- If you don't like the way your image came out, here are a few things you might try:
- Un-link the mask from the image and move the mask around to where it looks better.
- Select the mask and run a sharpen fiter over it.
- Adjust the contrast of the mask.
- If you don't want the background peering through, make a copy of your image and remove the layer mask. Change the color of the copy to something either a little darker or lighter and move it underneath the original layer for an interesting textured look.

It might not quite have the depth or nuance of the professional filters, but it's a good alternative for hobbyists who are just fooling around with Photoshop for a lark. I highly recommend reading the whole "That Wicked Worn Look" series for some great tips on how to make truly convincing distressed images.
